Quick Homemade Kimchi with Napa Cabbage
The first jar of kimchi I ever made sat on my kitchen counter for three days while I stared at it like it might explode. I had read so many warnings online about fermentation going wrong, about mould and bad smells and jars bursting, that I was half convinced I had created something dangerous. On the third day I finally worked up the courage to open it, and the hiss of gas escaping made me jump so hard I nearly dropped the jar. But then I tasted it, and it was extraordinary. Spicy, sour, crunchy, garlicky, alive in a way that shop-bought kimchi had never been. I ate a forkful straight from the jar, standing in my kitchen, and then another, and I understood why people make this at home.
That was years ago, and I have made kimchi dozens of times since, but I still remember that first jar because it taught me something important: kimchi is far more forgiving than the internet makes it sound. The traditional version, with whole cabbage leaves layered with paste and fermented for weeks in a clay pot, is a beautiful thing, but it is not the only way to do it. This quick version, where the cabbage is cut into bite-size pieces before it is salted, is easier, faster, and far more practical for a home kitchen. You can eat it the same day, fresh and crunchy like a spicy salad, or you can leave it to ferment for a day or two until it turns pleasantly sour. Either way, it is yours, made with your hands, and it will taste better than anything in a jar from the supermarket.
I make a batch of this kimchi about once a month now, usually on a Sunday afternoon when I have an hour to spare. The salting takes a couple of hours, but most of that time the cabbage is just sitting in a bowl doing its own thing while I get on with other jobs. The paste takes ten minutes to mix. And then I have a jar in the fridge that makes everything I eat for the next two weeks taste better. Rice, noodles, fried eggs, grilled chicken, a plain cheese sandwich: all of them are improved by a spoonful of kimchi on the side. If you have never made it before, this is the recipe to start with, because it is simple, it is quick, and it works.
Why You’ll Love This Recipe
You will love this recipe because it takes the mystery out of kimchi. So many kimchi recipes read like a science experiment, with warnings about brine percentages and fermentation weights and pH levels, and they scare people off before they even buy a cabbage. This one does not do that. You salt the cabbage, you rinse it, you mix it with a spicy paste, and you put it in a jar. That is the whole process. There is no special equipment, no fermentation crock, no thermometer. You need a big bowl, a jar with a lid, and a pair of hands you do not mind getting stained red with gochugaru.
You will also love it because it is ready so quickly. Traditional kimchi needs days or weeks to develop its flavour, and that is wonderful if you have the patience, but sometimes you want kimchi tonight. This quick version is delicious the moment you make it, fresh and crunchy and bright, like a spicy cabbage salad. And if you do leave it for a day or two, it changes, becoming tangier and more complex, so you get two different experiences from one batch. I usually eat half of it fresh on the first day and let the rest ferment, which feels like getting two recipes for the effort of one.
And then there is the flavour, which is the real reason to make kimchi at home. Shop-bought kimchi is fine, but it is often either too sweet or too sour, and it never has the crunch of a fresh batch. Homemade kimchi tastes alive. The cabbage stays crisp, the garlic and ginger are bright and punchy, and the heat from the gochugaru builds slowly instead of hitting you all at once. You can adjust everything to your own taste: more chilli if you like it hot, less fish sauce if you prefer it milder, extra spring onions if you love them. Once you have made your own, you will find it very hard to go back to the jar from the shop.
Ingredients You’ll Need
- 1 medium head napa cabbage, about 900 g (2 lb)
- 2 tablespoons coarse sea salt, or kosher salt
- 1 cup (240 ml) water
- 4 spring onions, cut into 2.5 cm (1 inch) pieces
- 1 medium carrot, peeled and julienned
- 4 cloves garlic, finely minced
- 1 tablespoon fresh ginger, peeled and finely grated
- 3 tablespoons gochugaru (Korean red pepper flakes)
- 2 tablespoons fish sauce
- 1 tablespoon soy sauce
- 1 tablespoon sugar
- 1 tablespoon rice vinegar
- 1 teaspoon toasted sesame seeds, optional
- 2 tablespoons glutinous rice flour, mixed with 1/2 cup water, optional but recommended
How to Make Quick Homemade Kimchi with Napa Cabbage
Start with the cabbage, and give yourself a big bowl, bigger than you think you need, because a whole head of napa cabbage takes up a surprising amount of space. Cut the cabbage in half lengthwise, cut out the tough core from each half, and then cut the halves crosswise into pieces about four centimetres wide, so you end up with bite-size pieces that are easy to eat with chopsticks. I like my kimchi pieces on the smaller side, because they are easier to mix with the paste and easier to serve, but if you prefer larger pieces, that is fine too. Put all the cabbage into the big bowl, sprinkle the salt over the top, and pour in the cup of water. Now get your hands in there and toss everything together, really working the salt into the leaves, turning and squeezing gently as you go. It will feel like a lot of cabbage at first, and you will wonder how it is all going to fit in a jar, but do not worry. The salt will do its work.
Leave the cabbage to sit for about two hours, tossing it every thirty minutes so the salt reaches every piece evenly. During this time, the salt draws water out of the cabbage through osmosis, which is a fancy word for a simple thing: the leaves will soften, wilt, and shrink to about half their original volume, and a puddle of salty water will collect at the bottom of the bowl. This is exactly what you want. The salting is what makes the cabbage crisp rather than soggy, and it is what creates the salty environment that lets the good bacteria do their work later. You can tell the cabbage is ready when you can bend a thick piece of stem in half without it snapping. If it still snaps, give it another thirty minutes. While the cabbage is salting, you can make the paste, which is the fun part.
To make the paste, put the garlic, ginger, gochugaru, fish sauce, soy sauce, sugar, and rice vinegar into a bowl and stir them together until you have a thick, bright red paste that smells so good you will want to taste it. If you are using the rice flour porridge, and I recommend that you do, make it now. Stir the glutinous rice flour into half a cup of cold water in a small saucepan, then heat it gently, stirring constantly, until it thickens into a smooth, glossy porridge, which takes about three minutes. Let it cool for a few minutes, then stir it into the paste. The porridge is not just a filler. It feeds the bacteria that ferment the kimchi, it helps the paste stick to the cabbage, and it gives the finished kimchi a lovely, slightly rounded flavour. My first few batches skipped it because I thought it was an unnecessary step, and the kimchi was still good, but once I tried it with the porridge, I never went back. The difference is real, and it is worth the three minutes.
When the cabbage has finished salting, drain it well and rinse it under cold running water, twice if you can, to wash off the excess salt. This rinsing matters, because if you skip it, the kimchi will be too salty to enjoy. Taste a piece after rinsing. It should taste pleasantly salty, like a well-seasoned vegetable, not like a mouthful of seawater. If it is still very salty, rinse it once more. Squeeze the cabbage gently in handfuls to get rid of as much water as you can, because watery cabbage makes watery kimchi, and then put it back into the big, clean bowl. Add the spring onions and the julienned carrot, and pour the paste over the top. Now put on a pair of kitchen gloves, because gochugaru stains your hands and stings any small cuts, and mix everything together with your hands, turning and squeezing gently so that every piece of cabbage is coated in the red paste. This is my favourite part of the whole process. The cabbage turns a beautiful, vivid red, the smell of garlic and ginger fills the kitchen, and you can feel the mixture coming together under your hands. Taste a piece and adjust if you need to: more gochugaru if you want heat, a little more sugar if you want it rounder, a splash more fish sauce if you want it saltier.
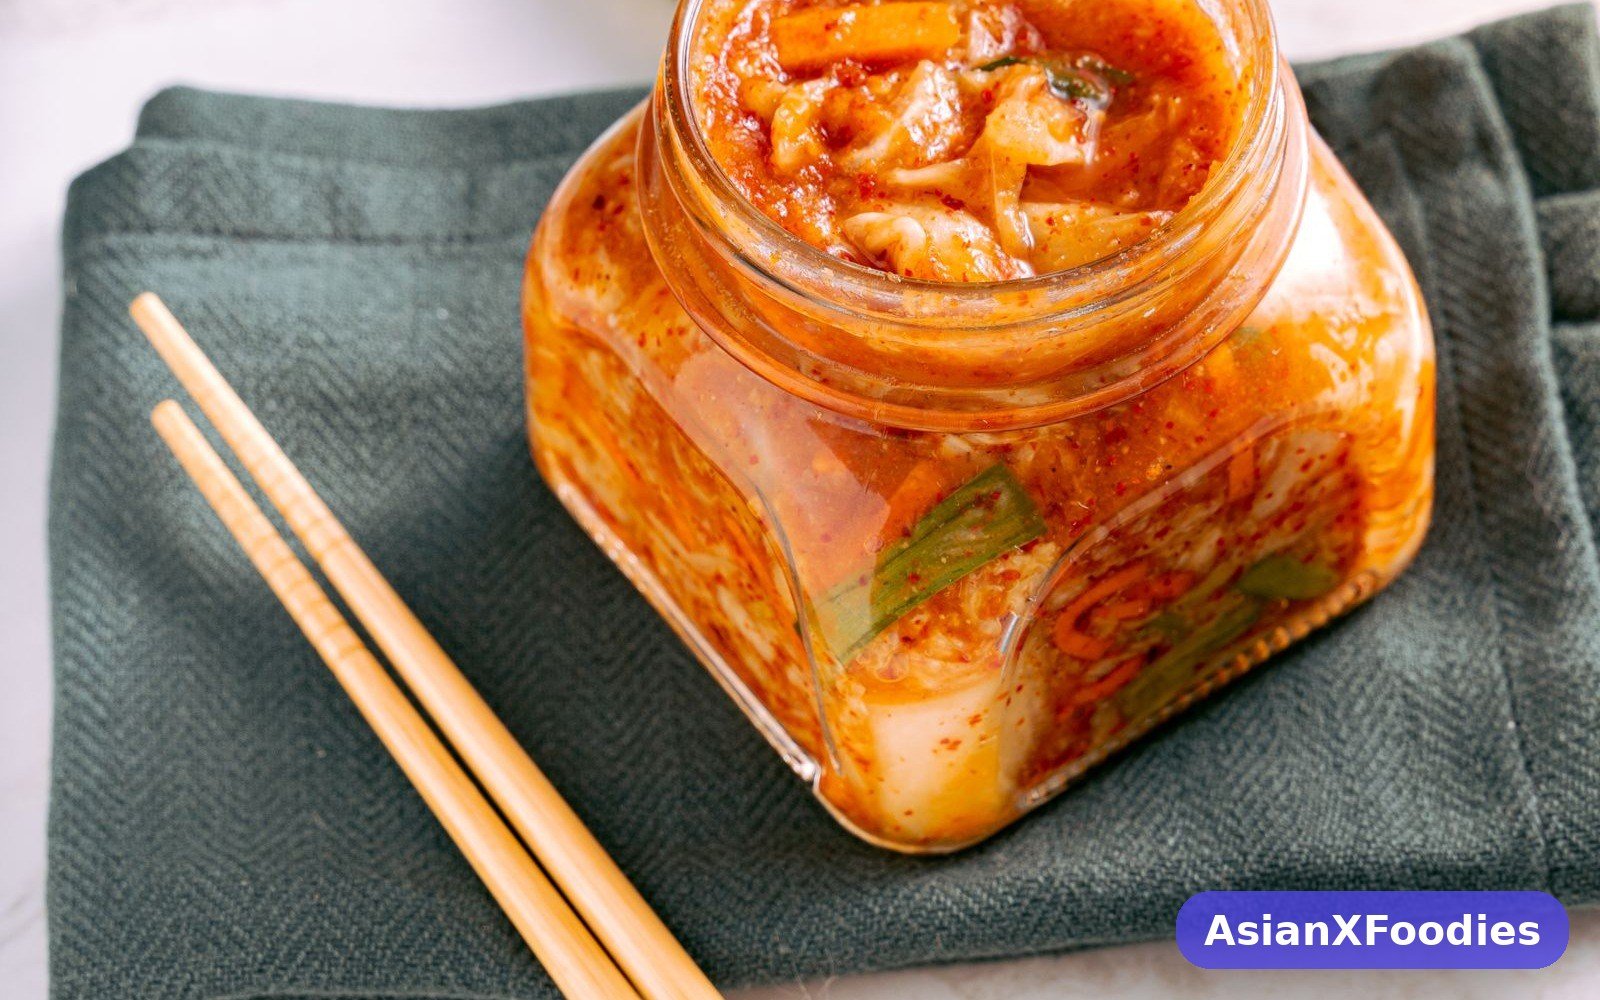
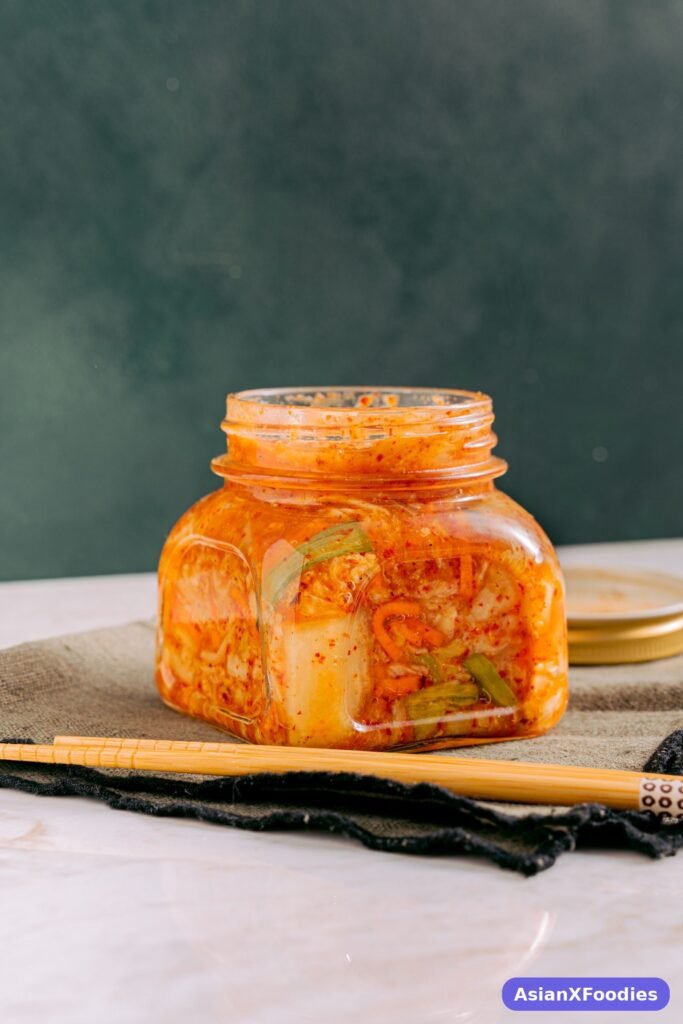
Pack the kimchi into a clean glass jar, pressing it down firmly with a spoon or your gloved hand so there are no air pockets, and leave about three centimetres of space at the top, because the kimchi will expand slightly as it ferments. Pour any leftover paste from the bowl over the top. You can eat it straight away, and I always do, because fresh kimchi is delicious, crunchy and bright and spicy. If you want it fermented, put the lid on loosely, not tight, and leave the jar at room temperature for one to two days, until it tastes pleasantly sour to you. You will know it is fermenting when you see tiny bubbles in the jar and the lid feels slightly pressurised. After that, tighten the lid and move the jar to the fridge, where it will keep for two to three weeks and keep getting more sour and more complex as time goes on. For a classic take on the same idea, BBC Good Food’s quick kimchi is a great reference, and Just One Cookbook’s quick Korean fresh kimchi shows the fresh, unfermented style beautifully.
Tips for the Best Quick Homemade Kimchi
The most important tip is about the salt, and it is one that catches people out. Use coarse sea salt or kosher salt, not fine table salt, because table salt contains anti-caking agents that can make the brine cloudy and give the kimchi a slightly bitter taste. It will still work in a pinch, but the flavour will not be as clean. And do not skip the rinsing step after salting. I know it feels like you are washing away all that work, but you are only washing away the excess salt on the surface. The cabbage has already absorbed what it needs, and the rinse is what keeps the finished kimchi balanced instead of mouth-puckeringly salty.
The second tip is to wear gloves when you mix the paste into the cabbage. Gochugaru stains skin a faint orange-red that takes a day or two to fade, and if you have any small cuts on your hands, the chilli and salt will find them. I learned this the hard way after mixing a batch bare-handed and spending the rest of the evening with stinging fingers. A pair of cheap disposable gloves, or even a plastic bag over each hand, makes the whole process much more pleasant. It also keeps things hygienic, which matters when you are making food that will sit in your fridge for weeks.
The third tip is about the jar. Use a glass jar, not plastic, because glass does not absorb smells or stains, and it is easier to see what is happening inside. Make sure the jar is scrupulously clean, and leave headroom at the top, because kimchi produces gas as it ferments, and a jar that is filled to the brim can overflow or, in rare cases, crack. Leave the lid slightly loose while the kimchi is fermenting at room temperature, and tighten it only once the jar goes into the fridge. I put my jar on a small plate while it ferments, just in case any liquid bubbles over, and that plate has saved my kitchen counter more than once.
Finally, trust your senses. Kimchi-making is not a precise science, and you do not need to be afraid of it. If the kimchi smells pleasantly sour and spicy, it is fine. If it smells like something you would happily eat, it is fine. A white film on the surface, which is a harmless yeast, can simply be skimmed off. But if the kimchi smells rotten, or if you see fuzzy green or black mould, throw it away and start again. That has happened to me exactly once, in a very hot summer, and it was obvious. Your nose knows, and you should trust it.
Variations to Try
Once you have made the basic version, there is a whole world of kimchi variations to explore. The easiest change is to add other vegetables. A handful of julienned daikon radish adds a lovely crunch and a mild peppery bite, and it is one of the most traditional additions. Thinly sliced cucumber, added at the end, gives a fresh, cooling contrast to the heat. I have also added a grated Asian pear to the paste, which is a classic Korean trick: the pear adds a gentle sweetness and helps the fermentation along, and it rounds out the flavour in a way that sugar alone does not. If you cannot find an Asian pear, a regular pear or even half an apple, grated finely, works well.
If you want a vegetarian or vegan version, leave out the fish sauce and use soy sauce instead, with a little extra salt to make up for it. Some people add a spoonful of miso paste for depth, which is a lovely idea and gives the kimchi a richer, more savoury flavour. The kimchi will still ferment perfectly well without fish sauce, because the bacteria that do the fermenting come from the cabbage itself, not from the sauce. I have made vegan kimchi for friends many times, and nobody has ever been able to tell the difference unless I pointed it out.
For a milder version, which is a good idea if you are making kimchi for children or for someone who does not like heat, reduce the gochugaru to one tablespoon and add an extra tablespoon of sugar. The kimchi will still be flavourful and tangy, but it will not have the same kick. And for a much hotter version, add a finely chopped fresh red chilli to the paste, or increase the gochugaru to four tablespoons. I have a friend who adds a spoonful of gochujang to her paste, which gives the kimchi a deeper, sweeter heat, and it is wonderful. The point is that kimchi is yours to adjust, and there is no single correct version.
Serving Ideas
Kimchi is one of those foods that goes with almost everything, and once you have a jar in the fridge, you will find yourself reaching for it constantly. The most obvious pairing is rice. A bowl of steaming white rice with a spoonful of kimchi on the side is a meal in itself, and it is the way I eat it most often. It is also wonderful with easy Korean beef bowls with ground beef, where the spicy, sour kimchi cuts through the richness of the beef beautifully, and with quick Korean chicken noodles, where it adds crunch and heat to every bite.
It is also the secret ingredient in fried rice. Stir a cup of kimchi, chopped, into easy chicken fried rice and you will have kimchi fried rice, which is one of the great comfort foods of the world, especially with a fried egg on top and the yolk running into the rice. I serve it with air fryer Korean fried chicken with gochujang glaze whenever I make it, because the cool, crunchy kimchi is the perfect contrast to the hot, sticky chicken. And on the days when I am eating simply, I put kimchi on toast with a fried egg, or in a grilled cheese sandwich, or on top of a baked potato with sour cream. It sounds odd until you try it, and then it becomes a habit.
Storage and Reheating
Kimchi is a fermented food, which means it is designed to be stored, and it keeps very well in the fridge. Once the jar is in the fridge, with the lid tightened, the kimchi will keep for two to three weeks, and it will keep changing as it ages. In the first few days, it is fresh and crunchy. After a week, it is pleasantly sour. After two weeks, it is properly tangy, and it is at its best for cooking, because the sourness adds a wonderful depth to fried rice, stews, and pancakes. I have kept kimchi for a month before, and it was still fine, although it was very sour by then and best used in cooking rather than eaten on its own.
Always use a clean fork or clean chopsticks to take kimchi out of the jar, because introducing other foods or dirty utensils can contaminate the batch. Keep the kimchi pressed down under its own brine as much as possible, because the brine is what protects it. If the kimchi starts to look dry on top, press it down with a clean spoon. You do not need to reheat kimchi, and in fact, you should not heat fresh kimchi if you want to enjoy its crunch, but older, sour kimchi is wonderful cooked. Fry it in a little oil for a few minutes before adding it to rice or noodles, and the heat will mellow the sourness and bring out a deep, savoury flavour that is completely different from the fresh version. Do not freeze kimchi, because freezing kills the live cultures and turns the cabbage mushy when it thaws.
Frequently Asked Questions
Is it safe to make kimchi at home?
Yes, it is very safe, as long as you follow a few basic rules. Use clean hands, clean bowls, and a clean jar. Use enough salt, because salt is what creates the environment where good bacteria thrive and bad bacteria cannot. Keep the kimchi submerged in its brine, and trust your nose. If it smells pleasantly sour and spicy, it is fine. If it smells rotten or you see fuzzy mould, throw it away. Millions of families have made kimchi at home for centuries, and the process is well understood and very forgiving.
How long does quick kimchi take to ferment?
You can eat it immediately, and it will taste like a fresh, spicy cabbage salad. If you want it fermented, leave it at room temperature for one to two days, then move it to the fridge. In a warm kitchen, it may be ready after one day. In a cool kitchen, it may take two or three days. Taste it every day and move it to the fridge when it reaches a sourness you like. There is no single right answer, because it depends on your kitchen temperature and your personal taste.
Why is my kimchi too salty?
The most common reason is that the cabbage was not rinsed well enough after salting. The salt does its work during the two-hour soak, and after that, the excess needs to be washed off. Rinse the cabbage twice under cold water and taste a piece before you mix in the paste. If it is still too salty, rinse it again. You can also balance a salty batch by adding more cabbage or a grated pear, which will absorb some of the salt.
Can I make kimchi without gochugaru?
Gochugaru is what gives kimchi its characteristic red colour and its distinctive flavour, which is fruity and smoky as well as hot, so it is hard to replace exactly. If you cannot find it, you can use a mixture of sweet paprika and a pinch of chilli flakes, which will give you the colour and some of the heat, although the flavour will be different. It is worth seeking out real gochugaru from an Asian grocer or online, because it makes a noticeable difference, and a bag will last you through many batches.
Why is my kimchi not bubbling or fermenting?
Fermentation depends on temperature and time. If your kitchen is cool, the kimchi may take longer to start fermenting, and you may not see obvious bubbles. Give it an extra day at room temperature, and make sure the jar is not in the fridge yet, because cold temperatures slow fermentation right down. If the kimchi still shows no signs of life after three days at room temperature, it may be that the cabbage was rinsed too thoroughly, washing away the natural bacteria, but this is rare. In most cases, patience is all that is needed.
Can I use regular cabbage instead of napa cabbage?
You can, and it will still be delicious, although the texture will be different. Regular green cabbage is crunchier and firmer than napa cabbage, and it takes a little longer to salt, so give it an extra thirty minutes. Savoy cabbage also works well, and it has a lovely, tender texture. Napa cabbage is traditional because it is tender and absorbs the paste beautifully, but if you cannot find it, do not let that stop you from making kimchi. Use what you have, and enjoy it.