
Chicken Katsu Curry with Japanese Rice
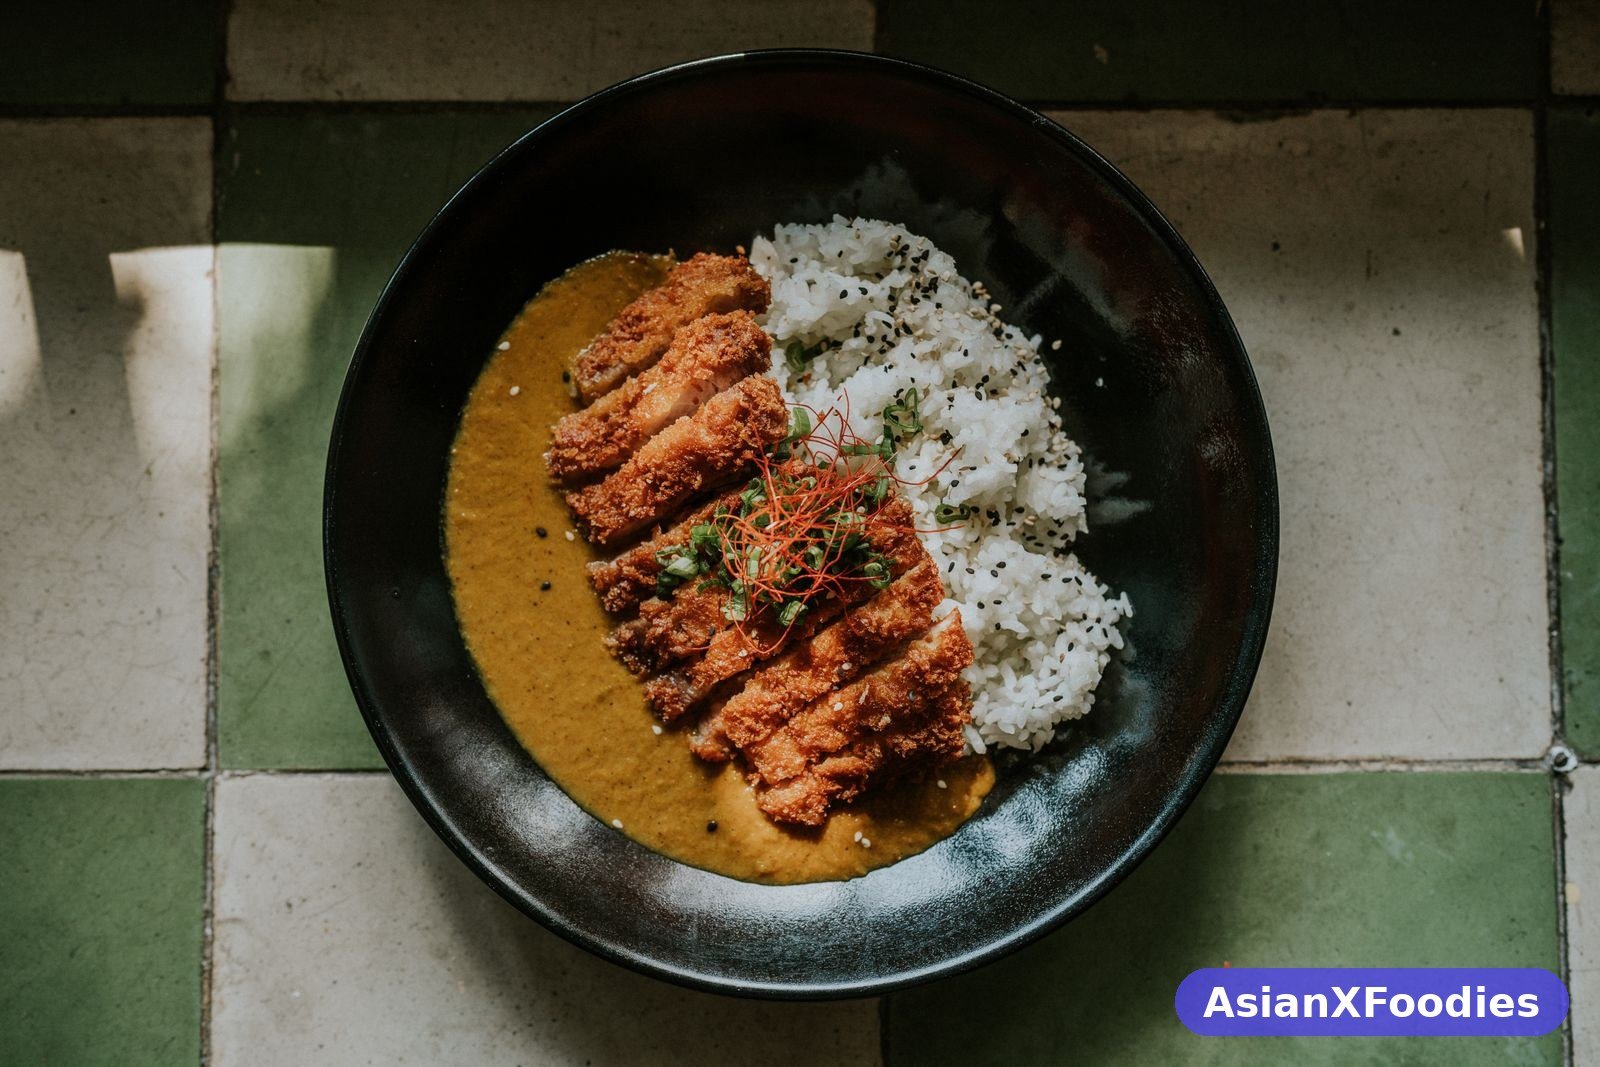
The first time I ate chicken katsu curry, I was not in Japan. I was in a tiny restaurant tucked between a laundrette and a phone repair shop, the kind of place with six tables, a hand-written menu, and a cook who did everything himself. I had gone in for a quick lunch and ordered the katsu curry because it was the cheapest thing on the menu that I had never tried. What arrived was a plate that looked almost too neat to eat: a mound of white rice, a ladle of thick brown curry sauce poured alongside it, and a row of golden chicken slices fanned across the top, each one showing the same perfect cross-section of crisp crumb and juicy meat. I cut into it with the side of my fork, the way you are supposed to, and the crust shattered. That sound — that small, dry crackle — is still the thing I think of first whenever I make this dish.
I have made it at home many times since then, and this is the version I have settled on. It is not a quick dinner, exactly — it takes about fifty minutes from start to finish — but none of it is difficult, and most of that time is the curry sauce simmering away on its own while you get on with the chicken. The work comes in three parts: a pot of plain Japanese rice, a thick, sweet, mildly spiced curry sauce made from scratch, and a chicken cutlet coated in panko breadcrumbs and fried until it is deeply golden. None of the three parts is hard. The pleasure is in putting them together on the plate, in that exact order, and cutting into the chicken with your fork at the table.
What I love about katsu curry is the contrast. The chicken is shatteringly crisp on the outside and tender inside, the curry sauce is thick and glossy and coats the rice instead of running off it, and the rice itself is plain and steaming, which is exactly what you want next to something so rich. Every bite is a little different — a piece of chicken with sauce, a spoonful of rice with sauce, a piece of chicken on its own, still crunchy. It is the kind of meal that makes people go quiet for the first few minutes, which is the highest compliment a home cook can get.
If you have only ever had katsu curry from a restaurant or a takeaway, making it at home will surprise you, mostly because it is so much cheaper and because you can make the sauce exactly the way you like it. My version is mild and slightly sweet, the way Japanese curry usually is, with onion, carrot and potato cooked down until they are soft, and a spoonful of honey and a dash of soy sauce to round it out. The chicken is pounded thin so it cooks quickly and stays juicy, and the panko is pressed on firmly so it stays put in the oil. It is the recipe I make when I want dinner to feel like a treat without actually being a lot of work.
Why You’ll Love This Recipe
The chicken is the first reason, and it is not a small one. A good katsu cutlet is one of the great textures in cooking: a crust of panko breadcrumbs that is light, airy and deeply golden, shattering when you cut into it, with juicy chicken underneath. Panko is different from ordinary breadcrumbs — the flakes are larger and drier, so they fry up crisper and they stay crisp longer, even under a ladle of hot curry sauce. I pound the chicken thin before I bread it, which does two things: it cooks in three or four minutes a side, so it does not dry out, and it gives you a wide, flat cutlet that is easy to slice into neat strips. The slicing matters, by the way. You slice the cutlet after frying, fan the pieces out, and that is how it is served — it looks beautiful, and it means nobody has to saw at a whole cutlet with a knife at the table.
The curry sauce is the second reason. Japanese curry is nothing like an Indian curry, and if you are expecting heat and a thin sauce, you will be surprised. It is thick — thick enough to sit on the rice in a glossy pool — and it is mild, sweet and savoury all at once, with the onion and carrot cooked down until they melt into the sauce. I make mine from scratch with curry powder, flour and stock, because it takes ten minutes of extra work and it tastes so much better than the version from a jar, but I will tell you honestly that the blocks of curry roux you can buy are also very good, and I use them myself on busy nights. Either way, the sauce is the part that makes the dish taste like a restaurant meal, and it is the part that people ask about.
It is also a wonderfully practical recipe, which matters more than it sounds. The sauce can be made a day ahead, and it actually tastes better the next day, because the flavours settle and deepen overnight. The chicken takes ten minutes to bread and fry. The rice cooks itself. So what looks like a complicated restaurant dish is really three simple jobs, and two of them can be done in advance. I have made this on a weeknight after work, and I have made it for a table of eight friends, and it worked both times, which is not something I can say about every recipe I own.
Finally, it is a crowd-pleaser in a way that very few recipes are. Children love it, because the chicken is basically a very good chicken nugget and the sauce is sweet and mild. Adults love it, because it is rich and satisfying without being heavy. It is the dish I make when I have people over and I do not know what they like, because I have never once had someone not finish their plate. The only argument it ever causes is over the last piece of chicken, and that is an argument I am happy to have at my table.
Ingredients You’ll Need
- 4 boneless, skinless chicken breasts (about 150g each)
- 1 teaspoon salt
- 1/2 teaspoon black pepper
- 60g plain flour
- 2 large eggs, beaten
- 120g panko breadcrumbs
- Vegetable oil, for frying
- 350g Japanese short-grain rice, rinsed
- 2 tablespoons vegetable oil, for the curry
- 2 large onions, thinly sliced
- 2 carrots, peeled and cut into small chunks
- 2 medium potatoes, peeled and cut into small chunks
- 3 cloves garlic, finely chopped
- 1 tablespoon fresh ginger, finely grated
- 2 tablespoons curry powder
- 1 teaspoon garam masala
- 3 tablespoons plain flour, for the curry sauce
- 700ml chicken stock
- 1 tablespoon soy sauce
- 1 tablespoon Worcestershire sauce
- 1 tablespoon honey
- 1 tablespoon tomato ketchup
- Salt, to taste
- 2 spring onions, finely sliced, to serve
- Pickled ginger or fukujinzuke, to serve (optional)
How to Make Chicken Katsu Curry with Japanese Rice
Start with the rice, because it needs time and it looks after itself. Rinse the short-grain rice in a bowl of cold water, swirling it with your hand, until the water runs mostly clear — usually three or four rinses. Drain it, put it in a pan with 450ml of cold water, and leave it to soak for twenty minutes if you have time. Bring it to the boil, then turn the heat right down, put the lid on, and cook it for twelve minutes without lifting the lid. I know it is tempting to peek. Do not peek. Take it off the heat and leave it, still lidded, for ten more minutes. The rice will be fluffy, slightly sticky, and perfect. If you use a rice cooker, just cook it the way you normally would and keep it warm.
While the rice cooks, make the curry sauce. Heat the oil in a large, deep pan over medium heat and add the sliced onions with a pinch of salt. Cook them slowly for about ten minutes, stirring now and then, until they are soft, sweet and turning golden at the edges. This is the step that most people rush, and it is the step that makes the biggest difference. Onion that is properly softened gives the sauce its sweetness and its body. Onion that is still raw and sharp gives the sauce a harsh edge that no amount of honey will fix. Give it the full ten minutes. I set a timer for this now, because I know I am tempted to move on after four minutes when the onion looks done. It is not done.
Add the garlic and ginger and cook for a minute until fragrant, then add the carrot and potato chunks and stir them around for a minute. Sprinkle over the curry powder, garam masala and flour, and stir for another minute until everything is coated and the spices smell warm and toasty. The flour is what thickens the sauce, so make sure it is stirred in well and there are no dry pockets. Then pour in the chicken stock a little at a time, stirring as you go so no lumps form, and add the soy sauce, Worcestershire sauce, honey and ketchup. Bring it to a gentle simmer, turn the heat down low, put the lid on slightly ajar, and let it cook for twenty minutes, stirring now and then, until the vegetables are soft and the sauce is thick enough to coat the back of a spoon.
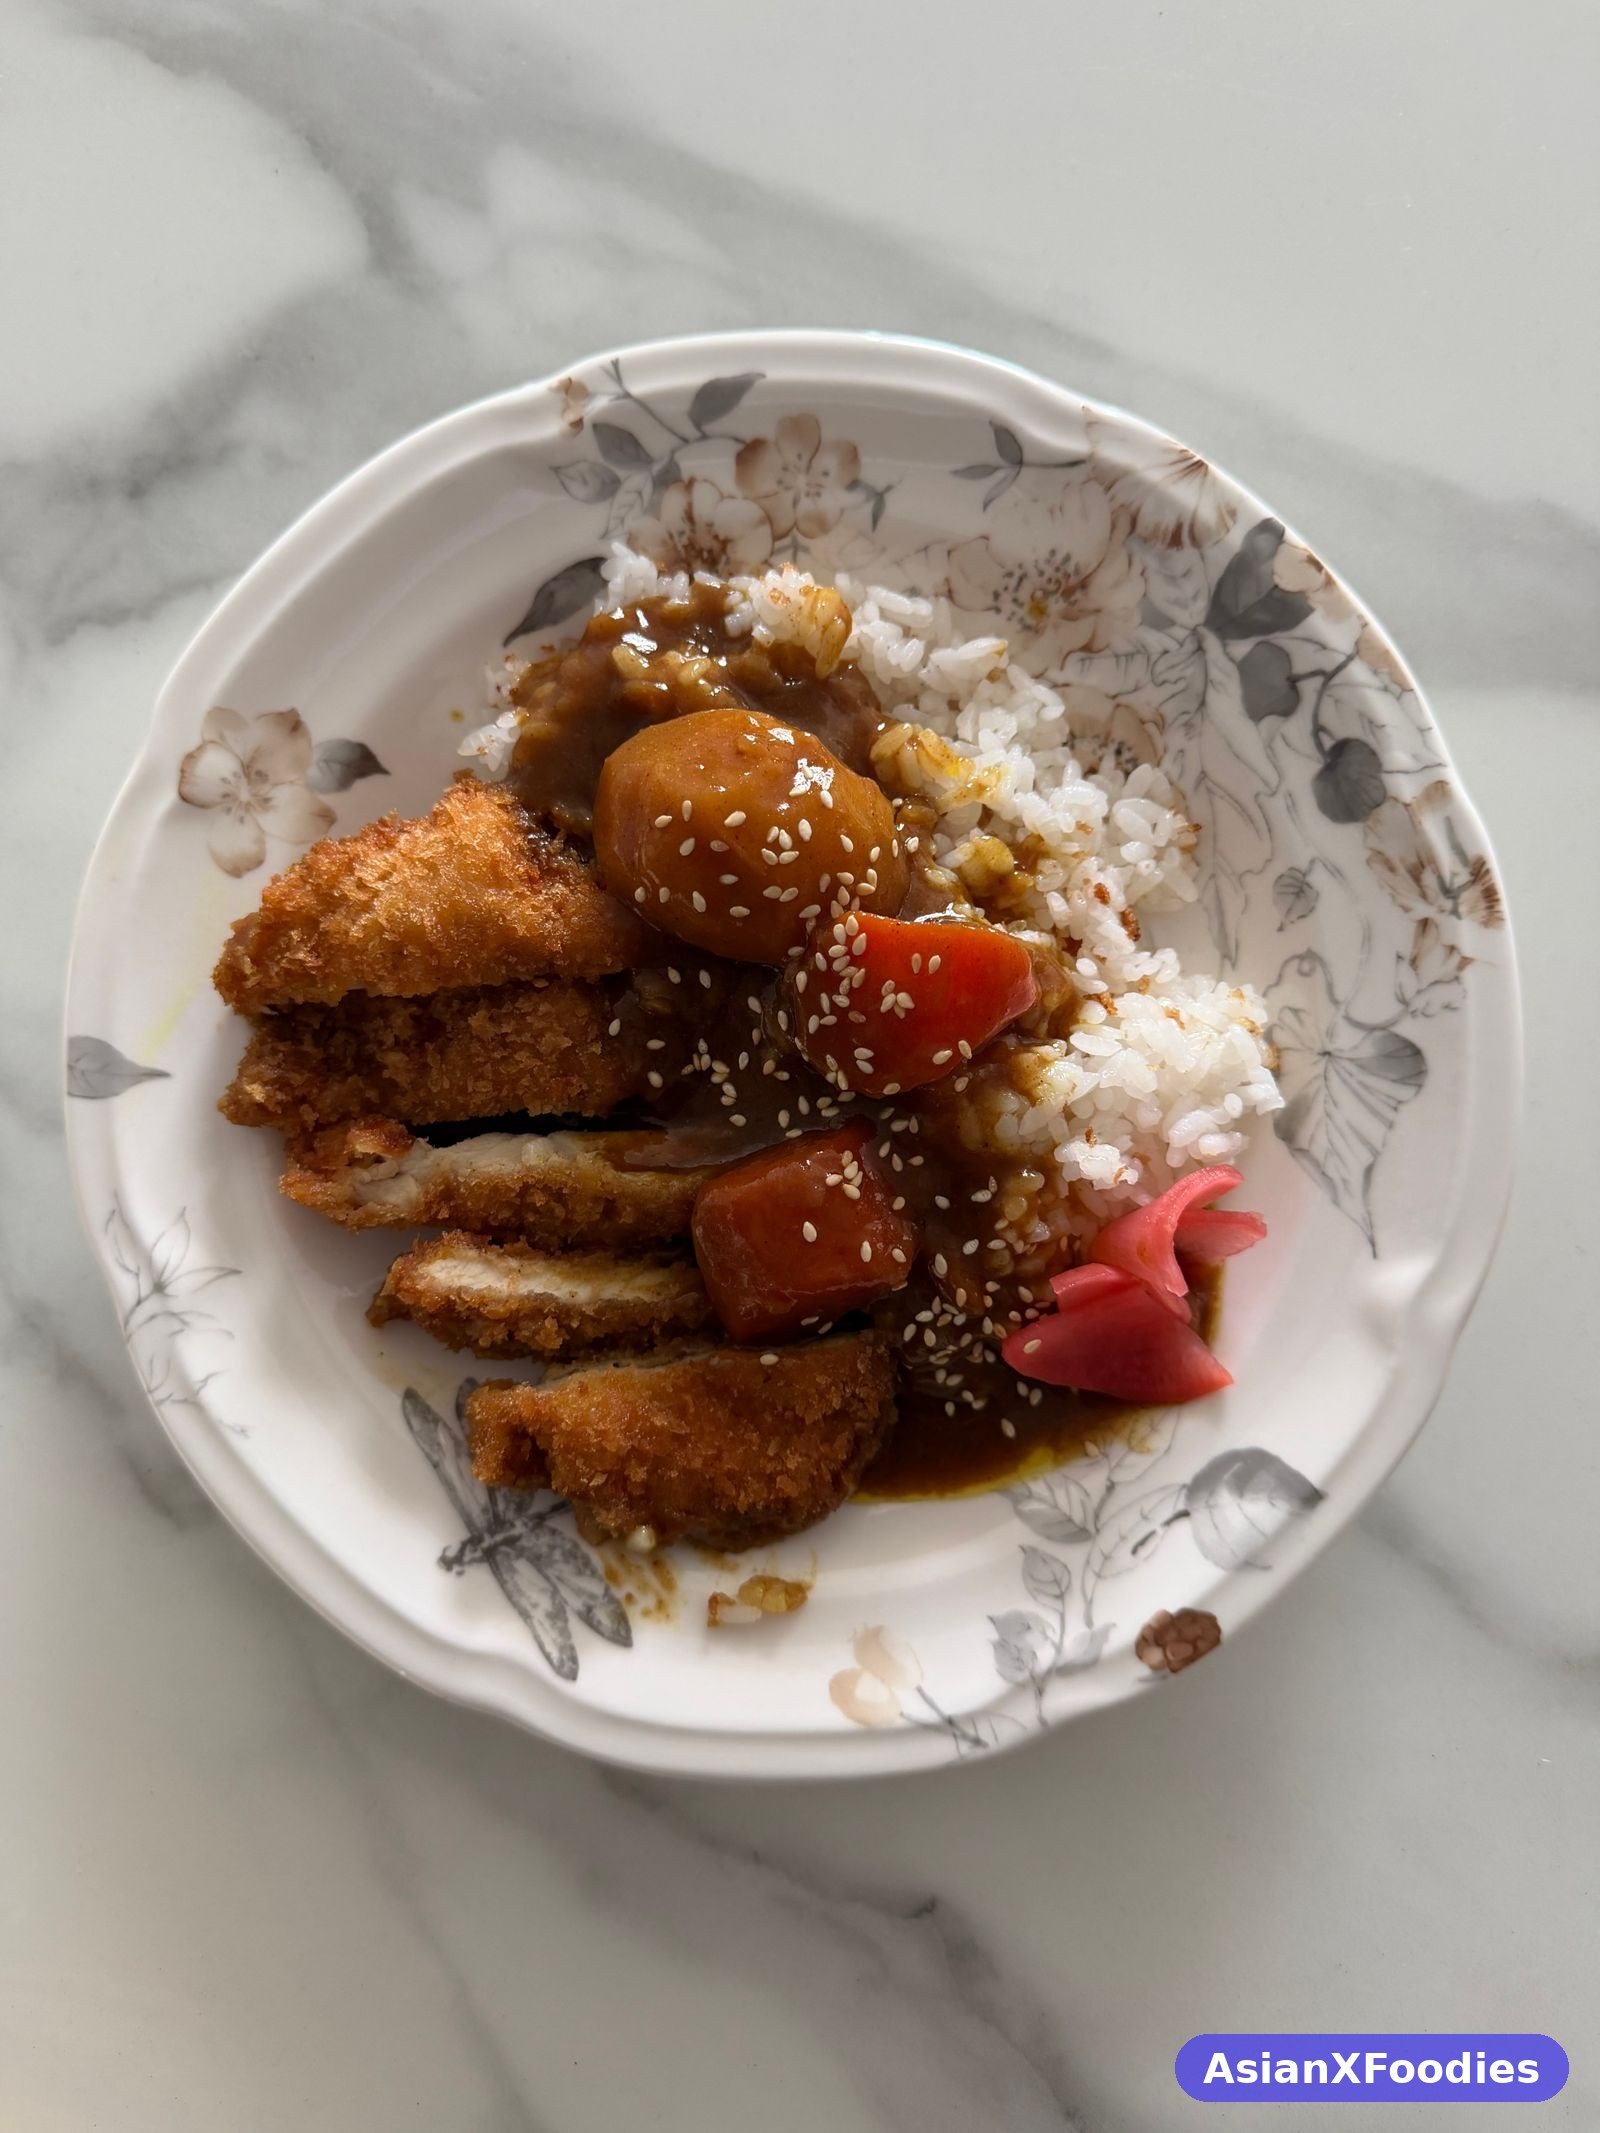
While the sauce simmers, get the chicken ready. Put a chicken breast between two sheets of cling film or baking paper and pound it gently with a rolling pin until it is about 1cm thick all over. Do not hit it hard enough to tear it — you want it even, not shredded. Season both sides with salt and pepper. Set up three shallow bowls: flour in the first, beaten egg in the second, panko in the third. Dip each piece of chicken in the flour and shake off the excess, then into the egg, letting the extra drip off, then into the panko, pressing the crumbs on firmly with your hands so they stick. I press quite hard here, because crumbs that are only sitting on the surface fall off in the oil, and crumbs that are pressed in stay put. Put the breaded cutlets on a plate and leave them for five minutes, which helps the coating set.
Heat about 2cm of vegetable oil in a large frying pan over medium-high heat. The oil is ready when a few panko crumbs dropped in sizzle immediately and turn golden in about thirty seconds. If the oil is too cool, the crumbs soak up oil and go soggy. If it is too hot, they burn before the chicken cooks. Lay the cutlets in the pan — two at a time, so you do not crowd it — and fry for three to four minutes on each side, until they are deeply golden and crisp. I do not move them around while they fry. Leave them alone and let the crust set. Lift them out onto a wire rack, not kitchen paper, because paper traps steam underneath and softens the crust, while a rack lets the air circulate and keeps it crisp. Sprinkle with a little salt while they are still hot.
By now the curry sauce should be thick and the vegetables soft. Taste it. It should be mild, savoury and slightly sweet, with the warmth of the curry powder sitting in the background. If it tastes flat, add a little more soy sauce. If it tastes too sharp, add a little more honey. If it is too thick, stir in a splash of hot water. If it is too thin, simmer it for five more minutes with the lid off. If you want it completely smooth, you can blend half of it and stir it back in, or push the vegetables through with a potato masher, but I usually leave it as it is — the soft chunks of carrot and potato are part of the pleasure. If you enjoy Japanese chicken dishes with this kind of gentle, savoury flavour, my easy Japanese teriyaki chicken without mirin is another weeknight favourite that uses the same kind of sweet-savoury balance.
To serve, spoon a mound of rice onto one side of each plate or shallow bowl, ladle the curry sauce alongside it — not over the rice, and not over the chicken — and slice each cutlet into strips about 2cm wide. Fan the strips out over the rice and sauce, so the cross-section shows. Scatter over the sliced spring onions and serve immediately, while the chicken is still crisp. The sauce is hot, the chicken is crisp, and the rice is steaming, and the whole plate looks like the one from that little restaurant, which is the point. I put the pickles on the table in a small dish and let people help themselves, because some people want a lot and some people want none, and both are right.
Tips for the Best Chicken Katsu Curry
Watch the oil temperature, because it is the difference between crisp chicken and soggy chicken. If you have a thermometer, you want the oil at about 175°C. If you do not, drop a few panko crumbs in: they should sizzle hard and turn golden in about thirty seconds. If they sink and barely bubble, the oil is too cool. If they go dark brown in ten seconds, it is too hot. I adjust the heat between batches, because the oil cools down when the cold chicken goes in, and I give it thirty seconds to come back up before I add the next cutlet. This one habit fixed most of my early katsu failures.
Do not crowd the pan. Two cutlets at a time in a normal frying pan, three at most in a very large one. Crowded chicken drops the oil temperature, steams instead of frying, and the coating goes soft and patchy. It is slower to cook in batches, but it is faster than cooking a whole batch badly and starting again, which I have done, and which I do not recommend. The same goes for the resting: let the fried cutlets sit on a wire rack for two minutes before you slice them. Cutting into them straight out of the oil lets the juices run out and softens the crust from the inside.
Pound the chicken evenly. A cutlet that is thick in the middle and thin at the edges cooks unevenly — the thin parts dry out while the thick part is still pink. A minute with a rolling pin fixes this, and it is the single most useful thing you can do for this recipe. If you do not have a rolling pin, the bottom of a heavy pan works. If the chicken breasts are very thick, you can slice them in half horizontally first, which gives you four thinner cutlets that cook even faster. I do this when the breasts are large, and it also means the recipe stretches to feed more people.
Make the sauce the way you like it, because it is yours. If you want it sweeter, add a little more honey. If you want it deeper, add a little more Worcestershire sauce. If you want it thicker, simmer it longer. If you want it smoother, blend it. I have made this sauce a dozen ways, and the framework is the same every time: soft onion, spices and flour, stock, a long simmer, and a sweet-savoury seasoning at the end. Once you have made it once, you will know exactly how you like it, and you will never need to measure the honey again.
Variations to Try
For a pork version, use pork loin steaks instead of chicken and make tonkatsu, which is the original dish this recipe comes from. Pound the pork thin, bread it the same way, and fry it for a minute longer on each side. Pork katsu is richer than chicken katsu, and it is wonderful with the same curry sauce. If you are not sure which you prefer, make two of each — the chicken for the children and the pork for the adults, or the other way round, depending on your house.
For a lighter version, bake or air fry the cutlets instead of deep frying them. Spray the breaded chicken generously with oil, bake at 200°C for about twenty minutes, turning once, or air fry at 200°C for twelve to fourteen minutes, turning halfway. The crust will not be quite as golden as the fried version, but it will still be crisp, and it is a good option for a weeknight. My air fryer Japanese chicken karaage uses the same idea — hot air, a good spray of oil, and a coating that goes properly crisp — and it is the version I make when I do not feel like dealing with a pan of hot oil.
For a spicier version, add a teaspoon of chilli flakes or a finely chopped red chilli to the sauce along with the curry powder, or stir in a spoonful of hot sauce at the end. Japanese curry is traditionally mild, so even a small amount of heat makes a noticeable difference. I make the mild version for the table and put a bottle of hot sauce on the side for anyone who wants more, which keeps everyone happy and means I only cook one pot of sauce.
For a vegetarian version, use thick slices of aubergine or sweet potato instead of chicken. Salt the aubergine slices and leave them for ten minutes, pat them dry, then flour, egg and panko them exactly the same way. They fry in about two minutes a side. Sweet potato slices need a few minutes longer. Both are delicious with the curry sauce, and the aubergine version in particular has a soft, creamy inside that works beautifully against the crisp coating. If you want a second chicken-and-rice dish to compare it with, the one-pan chicken biryani with fragrant spices is a completely different kind of comfort, all in one pot.
Serving Ideas
Shredded cabbage is the classic partner, and it is there for a reason. A pile of finely shredded white cabbage, lightly salted, with a little lemon juice or a drizzle of sesame dressing, is cool and crunchy against the hot, rich curry, and it cleans the palate between bites. I shred it as finely as I can, almost like coleslaw, and I make more than I think I will need, because it disappears fast. A small bowl of miso soup on the side makes the meal feel complete, and it takes five minutes if you use instant miso paste.
Pickles are the other essential. Fukujinzuke, the sweet pickled vegetables you get with curry in Japan, is the traditional choice, and you can find it in most Asian supermarkets. Pickled ginger works too, and so does a simple quick pickle of cucumber — sliced thin, salted for ten minutes, squeezed dry, and tossed with rice vinegar and a pinch of sugar. The sharpness of the pickle cuts through the richness of the sauce, and I always put a small dish of it on the table, because the meal feels incomplete without it.
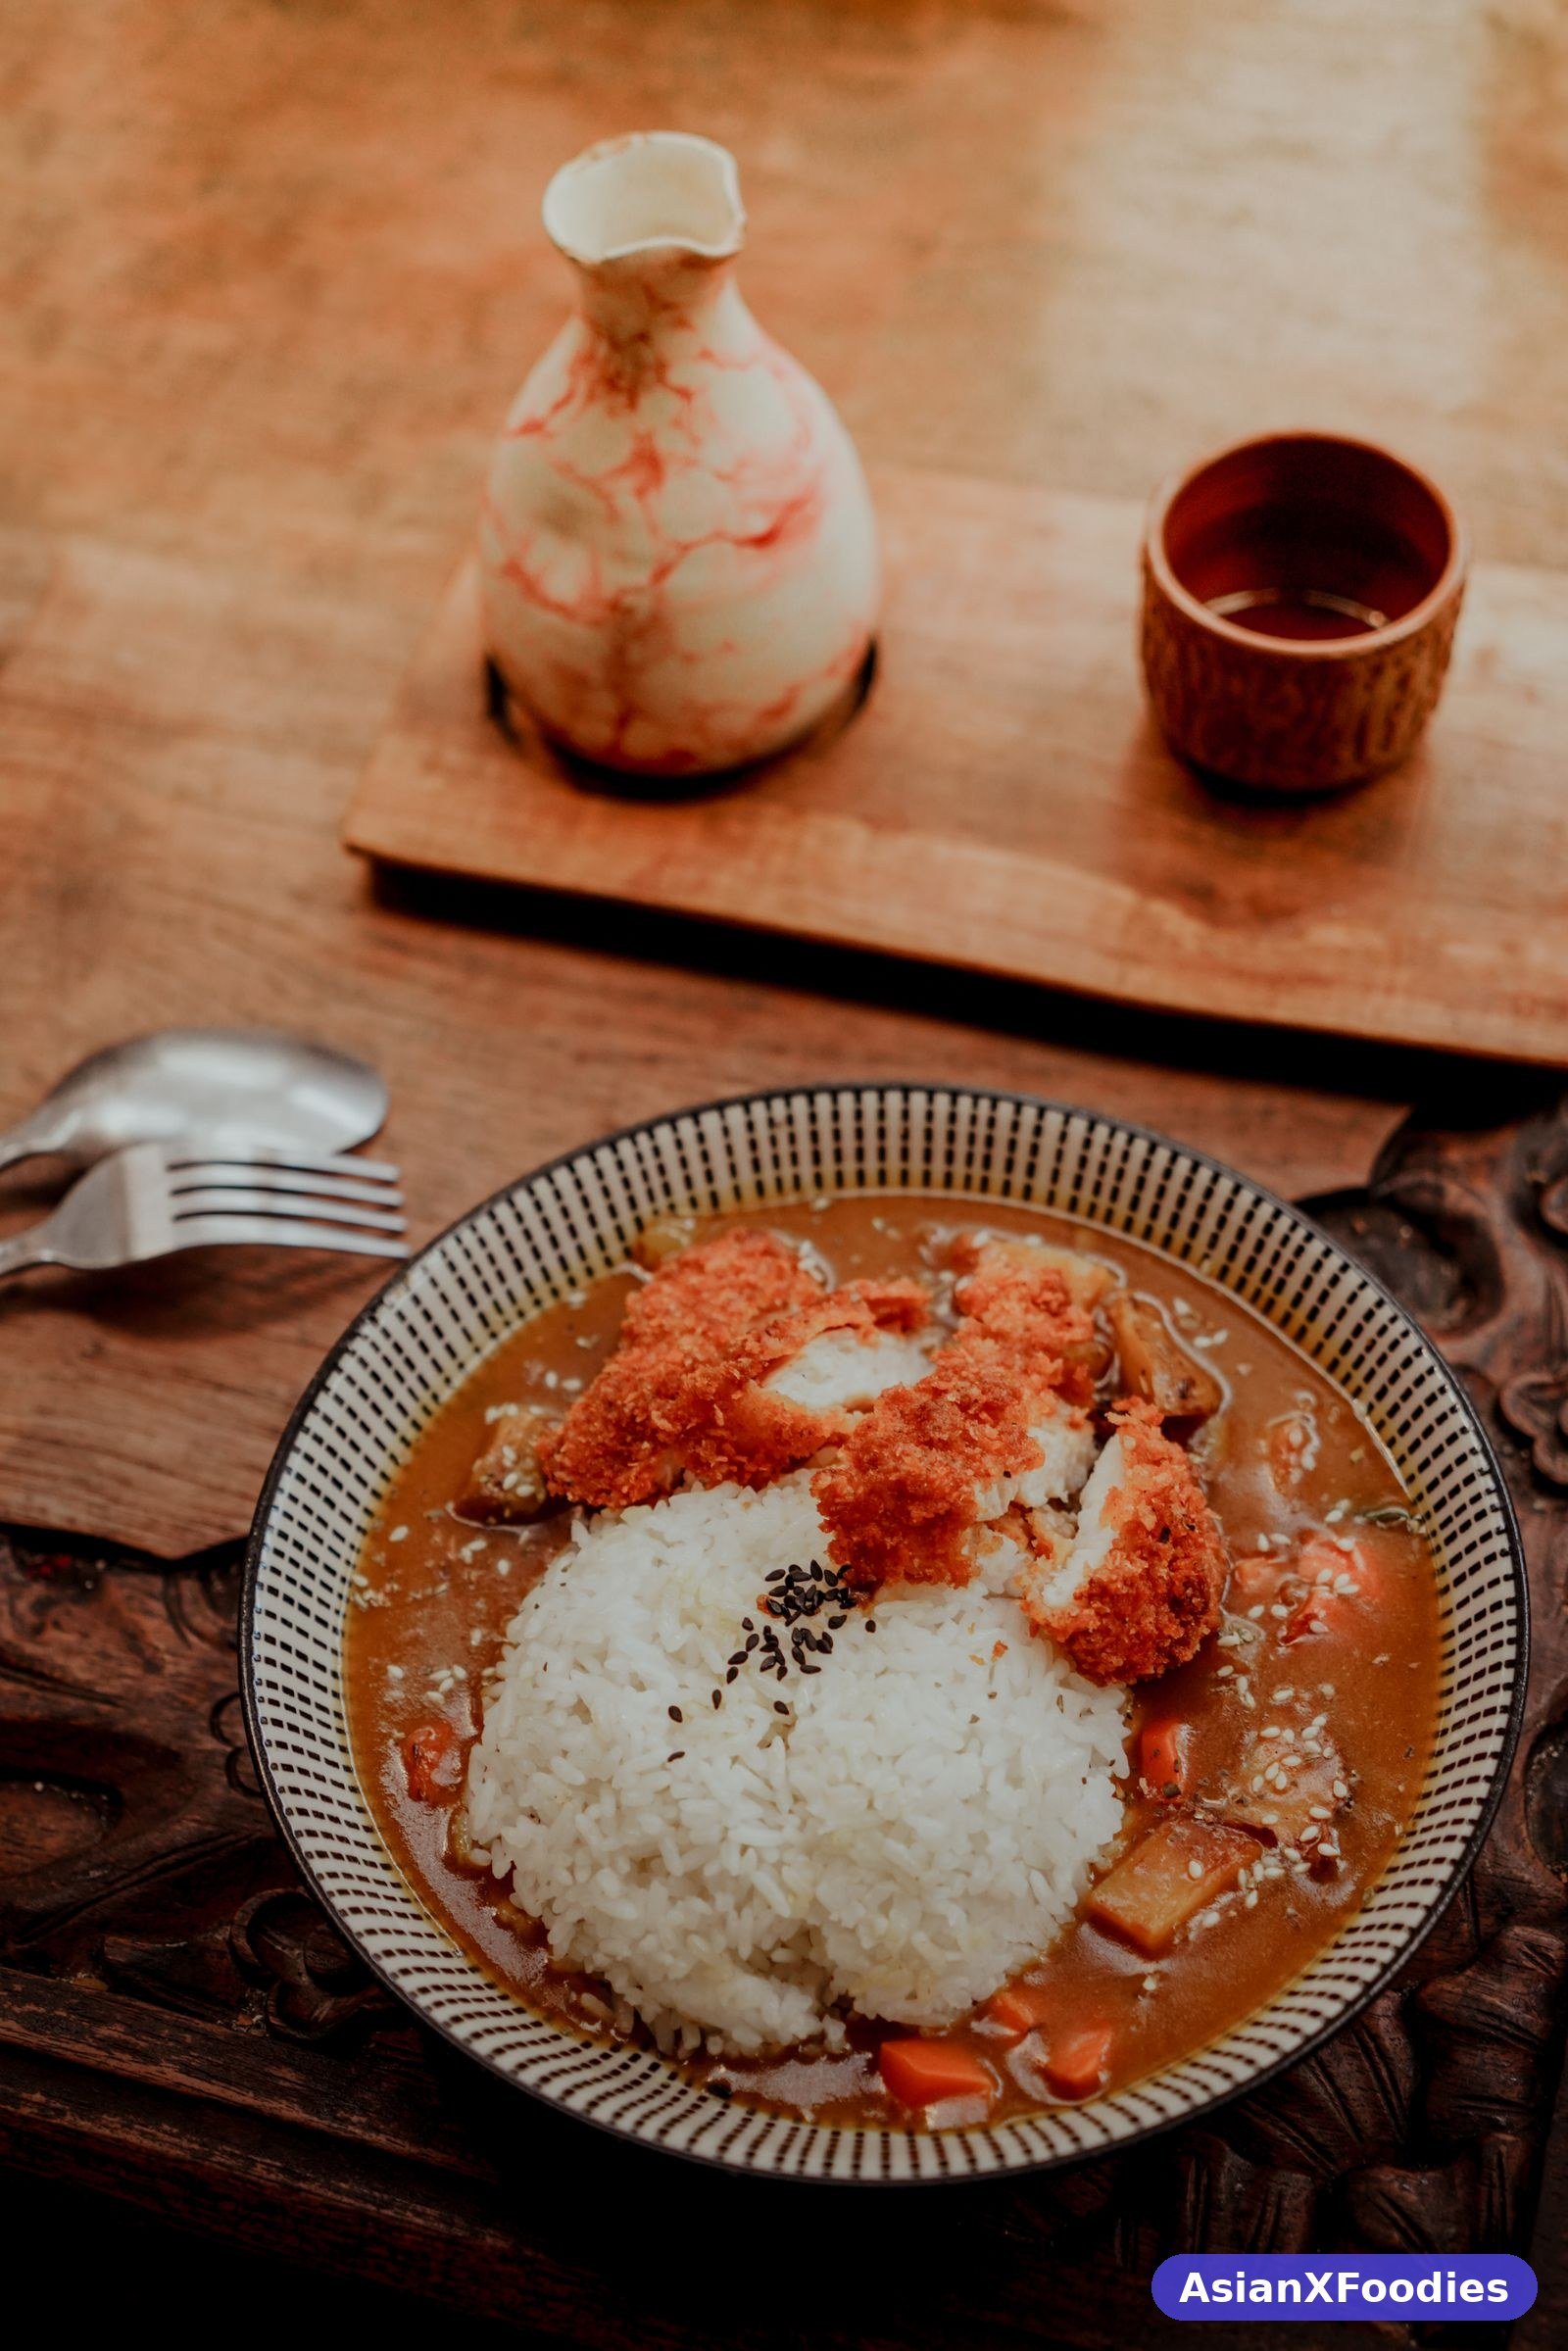
For drinks, I usually serve iced green tea or cold water with lemon, because the meal is rich enough without a sweet drink on top. A cold lager works beautifully too, and it is what I reach for on a Friday night. For a fuller table, I sometimes start with a small bowl of soup — my simple chicken ramen with pantry ingredients is a gentle way to begin, though I usually serve the katsu curry on its own and let it be the star. If I am feeding a crowd, I put the rice in one big bowl, the curry in a serving pot, and the sliced katsu on a platter, and let everyone build their own plate. It feels generous, and it is, without being a lot of extra work.
Storage and Reheating
Leftovers keep in the fridge for up to three days, but store the three parts separately, because that is the only way to keep the chicken crisp. The curry sauce goes in a sealed container, the rice in another, and the leftover katsu in a third, wrapped loosely so it does not steam itself soft. I actually prefer the second-day sauce, because the flavours deepen overnight, and I have said this to people who thought I was joking. I was not joking. The sauce thickens slightly in the fridge, the spices settle, and it tastes rounder and richer the next day.
To reheat, warm the sauce in a pan over low heat, stirring now and then, and add a splash of water if it has thickened too much. Reheat the rice in the microwave with a sprinkle of water, or steam it for a few minutes. The chicken is the important part: do not microwave it, or the coating will go soft and sad. Reheat it in a hot oven at 200°C for five or six minutes, or in an air fryer at 190°C for three or four minutes, until it is hot through and the crust is crisp again. It will not be quite as good as fresh, but it will be very close, and it is a wonderful thing to have waiting in the fridge on a night when you do not feel like cooking.
The curry sauce freezes well, which makes it a good batch-cooking recipe. Freeze it, without the chicken and rice, in portions for up to three months. I freeze it in flat bags, labelled with the date, because flat bags defrost faster and stack neatly in the freezer. Defrost overnight in the fridge, reheat gently, and fry fresh chicken to go with it. It will taste almost as good as fresh, and it is the closest thing to a home-cooked meal that you can pull out of the freezer.
Frequently Asked Questions
Can I use curry roux blocks instead of making the sauce from scratch?
Yes, and honestly, most nights I would not blame you. Curry roux blocks are how most Japanese home cooks make this dish, and they are very good. Brown the onion, carrot and potato, add water or stock, simmer until the vegetables are soft, then break in the roux blocks and stir until the sauce thickens. Start with about half a box for the quantities above and add more if you want it thicker. The from-scratch version in this recipe gives you more control over the sweetness and the spice, but the blocks give you dinner in twenty-five minutes, and that is worth a lot on a busy night. Just One Cookbook has a clear katsu curry guide that walks through the roux-block method step by step, and BBC Good Food has a reliable chicken katsu curry version too, if you want to compare the two approaches before you decide.
Can I bake or air fry the chicken katsu instead of deep frying it?
Yes, you can. Spray the breaded cutlets generously with oil on both sides, then bake at 200°C for about twenty minutes, turning once halfway through, or air fry at 200°C for twelve to fourteen minutes, turning halfway. The crust will be golden and crisp, though not quite as deeply golden as the fried version, and the chicken will be juicy as long as you do not overcook it. I check a thick piece by cutting it open: it should be white all the way through, with clear juices. The air fryer method is the one I use most often on weeknights, and it works beautifully — my air fryer Japanese chicken karaage uses the same hot-air approach, and it is proof that you can get a proper crunch without a pan of oil.
Why is my katsu coating falling off in the pan?
This usually happens for one of three reasons. First, the chicken was wet when you breaded it, so the flour never stuck — pat the chicken dry with kitchen paper before you start. Second, the panko was not pressed on firmly enough, so it was only sitting on the surface — press it in with your hands until it feels attached. Third, the oil was too cool, so the coating soaked up oil and slid off instead of setting immediately. Let the breaded cutlets rest for five minutes before frying, which helps the coating set, and do not move them around in the pan for the first minute, because the crust needs time to form before it can be disturbed.
What rice works best for katsu curry?
Japanese short-grain rice is the right choice, because it is slightly sticky and it holds together in a neat mound on the plate, which is part of how the dish is meant to look. Jasmine rice works as a substitute — it is a little less sticky, but the flavour is fine. I would not use basmati here, because it is long and fluffy and it does not sit under curry sauce the same way. Whatever rice you use, cook it plain, with no salt and no butter, because the sauce brings all the flavour and the rice is there to be a calm, steaming base for it.
Can I make the curry sauce ahead of time?
Yes, and it is a good idea. The sauce keeps in the fridge for up to three days, and it freezes well for up to three months. Make the sauce, cool it, and store it in a sealed container. When you are ready to eat, fry the chicken, cook the rice, and reheat the sauce gently in a pan. This is how I cook for dinner parties — the sauce is done the day before, and the last part takes twenty minutes. Just remember to reheat the sauce slowly and stir it often, because a thick sauce can catch on the bottom of the pan if you leave it alone.
Is chicken katsu curry spicy?
Not in this version. Japanese curry is mild and slightly sweet, and the heat in this recipe is just a background warmth from the curry powder, which most people who say they do not like spicy food eat happily. My children eat it without complaint, which is the only review that matters. If you want it hotter, add a teaspoon of chilli flakes to the sauce, or keep a bottle of hot sauce on the table for anyone who wants more. The heat is easy to adjust, and I would rather you adjust it to your taste than follow my numbers exactly.


One Comment